We gave our AI assistant access to our React Components and MCP Server
Most AI chatbots we tried were pretty useless. They just write a screed on how to navigate to a page or don’t have enough context about you to actually be helpful.
We figured: if we already have React components and APIs to perform actions within our app, the assistant should be able to render and interact with them directly.
Now you can just ask for what you want and it will search your data, render the UI to perform actions, and explain how the app works.
How It Works Under the Hood
At a high level,
-
Wrapped our existing React components in Zod schemas. This gave tambo a contract for what props each component needed and what they did.
-
Registered those components with tambo. Now the assistant had a library of real UI it could choose from, instead of spitting out text instructions.
-
Hooked in our APIs as tools. To provide context to the assistant about this user’s data so the AI can render the components with the correct data.
-
Used MCP to include our documentation. We wanted to include the knowledge from our existing documentation so the assistant can answer questions about our product. We used Inkeep’s Doc MCP server for this.
-
Add Chat Assistant. We then pass the registry of information and the MCP server to the TamboProvider. This is where the magic happens.
That’s the mental model: schemas for shape, components for UI, tools/docs for context. Everything else is just configuration.
React Components -> Zod Schemas -> Tools/MCP Servers -> TamboProvider -> Chat Assistant
How we did it
By the way our repo is open source, so you can see the code for yourself.
Let’s walk through one example component we added to the assistant.
It takes 5 steps to add an AI assistant to your app with Interactive React Components, Client Side Tools, and MCP Server.
1. Create Zod Schemas for Your Components
Example: the APIKeyList component.
export const APIKeyListProps = z.object({
  project: z
    .object({
      id: z.string(),
      name: z.string(),
    })
    .optional()
    .describe("The project to fetch API keys for."),
  isLoading: z
    .boolean()
    .optional()
    .describe("Whether the API keys are loading."),
  onEdited: z
    .function()
    .args()
    .returns(z.void())
    .optional()
    .describe(
      "Optional callback function triggered when API keys are successfully updated.",
    ),
});
2. Register the component
Register the component you just defined the schema for.
Example: Registering the APIKeyList component.
export const tamboRegisteredComponents = [
  {
    name: "APIKeyList",
    description:
      "Manages project API keys with full CRUD operations - create, view, and delete API keys. Automatically generates a first key for new projects. Shows masked key values, last usage dates, and provides secure key generation with one-time display. Includes animated interactions and handles loading states. Use when users need to manage authentication keys for their project.",
    component: APIKeyList,
    propsSchema: APIKeyListProps,
  },
];
3. Register Your API Tools
This is where your backend actually hooks in. In our case, we wired in the generateApiKey endpoint. You’d do the same with your own API.
export const generateProjectApiKeySchema = z
  .function()
  .args(
    z.string().describe("The project ID"),
    z.string().describe("The name of the API key"),
  )
  .returns(
    z.object({
      apiKey: z.string(),
      id: z.string(),
      name: z.string(),
      partiallyHiddenKey: z.string().nullable(),
      lastUsedAt: z.date().nullable(),
      projectId: z.string(),
      hashedKey: z.string(),
      createdAt: z.date(),
      updatedAt: z.date(),
      createdByUserId: z.string(),
    }),
  );

export function useTamboManagementTools() {
  const { registerTool } = useTambo();
  const apiClient = useTRPCClient();

  useEffect(() => {
    registerTool({
      name: "generateProjectApiKey",
      description: "Generate a new API key for the current project",
      tool: async (projectId: string, name: string) => {
        return await apiClient.generateApiKey.mutate({ projectId, name });
      },
      toolSchema: generateProjectApiKeySchema,
    });
  }, [registerTool, apiClient]);
}
4. Configure the TamboProvider
That’s it—you’re done.
(Note: useTamboManagementTools uses registerTool internally, so you don’t need to pass it into the provider manually.)
export default async function RootLayout({ children }: { children: React.ReactNode }) {
  return (
    <TamboProvider
      apiKey={env.NEXT_PUBLIC_TAMBO_API_KEY!}
      components={tamboRegisteredComponents}
    >
      {children}
    </TamboProvider>
  );
}
5. Register the MCP Server
We also wanted the assistant to explain tambo itself. That’s where Inkeep’s MCP server came in. It adds doc context into the assistant so it can answer questions, drop in the right code snippet, or even render UI to set things up. To add one:
You can plug in your own MCP server to give the assistant context about your product. Our MCP server is also public if you’re building with tambo and want doc-aware context.
Why We Like This Approach
- No Custom UI: We didn’t need new components—just schemas around the old ones.
- Better UX: The assistant feels less like a chatbot and more like another layer of the UI.
- Faster Adoption: Users don’t need to spend time learning our UI and can get things done.
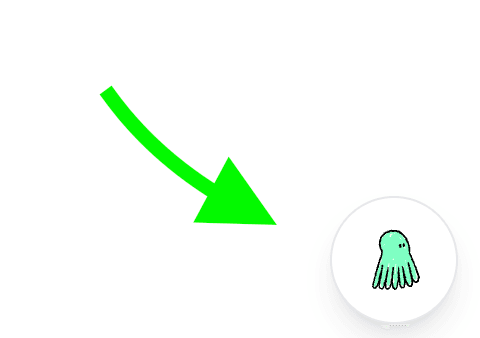
Try It Yourself
Click the little chat bubble in the corner of this site and start chatting with our assistant.
Wrapping up
We think AI should leverage the power of language and graphical user interfaces. With tambo and MCP, we ended up with an assistant that can both explain things with natural language and can perform actions and display rich information without leaving the chat. We think this is a powerful paradigm for building AI-powered applications.
Check out our repository or join our discord. We’re always around to help!
What do you think? Is this an improvement on traditional AI chatbots? We’d love to hear your thoughts!